

Last Updated on April 3, 2022 by Rakesh Gupta
Big Idea or Enduring Question:
How do you deploy Flows or Processes using the Visual Studio Code?
Objectives:
After reading this blog post, the reader will be able to:
- Understand how to use the Visual Studio Code to deploy flows
- Understand how to use the Visual Studio Code to deploy processes
- Deploy components to any org using the Visual Studio Code
Business Use Case
Pamela Kline is working as a System administrator in Universal Container. She has developed Auto Select Automatically follow records that I create Checkbox flow in Organization Developer Sandbox (Dev3) Org and done with testing. She wants to deploy this flow to their another Developer Sandbox (Dev4).
Automation Champion Approach (I-do):
Once you are done, with Flow or Process development, the next step is to deploy it. There are many ways, through which, you can deploy or distribute, Flow(s) or Process(s), from one org to another:
- Change Sets
- Packages
- Visual Studio Code
- Workbench
- Force.com Migration Tool
This blog is a sequel to my previous blog – Distribute Flows or Process using Packages. In this article, I’m going to discuss how to deploy a Process/Flow using the Visual Studio Code. Visual Studio Code is the go-to code editor for Salesforce developers.
Salesforce Extensions for Visual Studio Code provides a unified interface for building and deploying applications on Salesforce platform. The Salesforce Extension pack includes tools for developing on the Salesforce platform in the lightweight, extensible VS Code editor. These tools provide features for working with development orgs (scratch orgs, sandboxes, and DE orgs), Apex, Aura components, and Visualforce.
Visual Studio Code allows us to deploy the Flows and Processes in different environments, for example, Developer Edition org and Production Org. Let’s start with a business use case.
Before proceeding ahead, you have to Install and configure the Visual Studio Code. Refer to this link to download, install, and configure VS Code and Salesforce Extension. Follow the below instructions to create a Project and deploy it to another Salesforce org.
- The very first step is to create a project by following the steps below:
- Open Visual Studio Code, click on View | Command Palette.
- Select SFDX: Create Project with Manifest, select the Standard template and press Enter.
- Type the project name FlowDeployment and press Enter.
- Select your Desktop as the place to save the project in so it is easy to find later on.
- Wait for the new Visual Studio Code window to open the editor.
- The second step is to authorize Source Org, i.e. Dev3 in the scenario:
- Navigate to Visual Studio Code, click on View | Command Palette.
- Select SFDX: Authorize an Org, select the Sandbox option.
- Enter the alias Dev3 and press Enter.
- Follow on screen instructions to grant your org access to the connected app.
- In the end, make sure that you’re connected to right org i.e. Dev3 in this scenario.

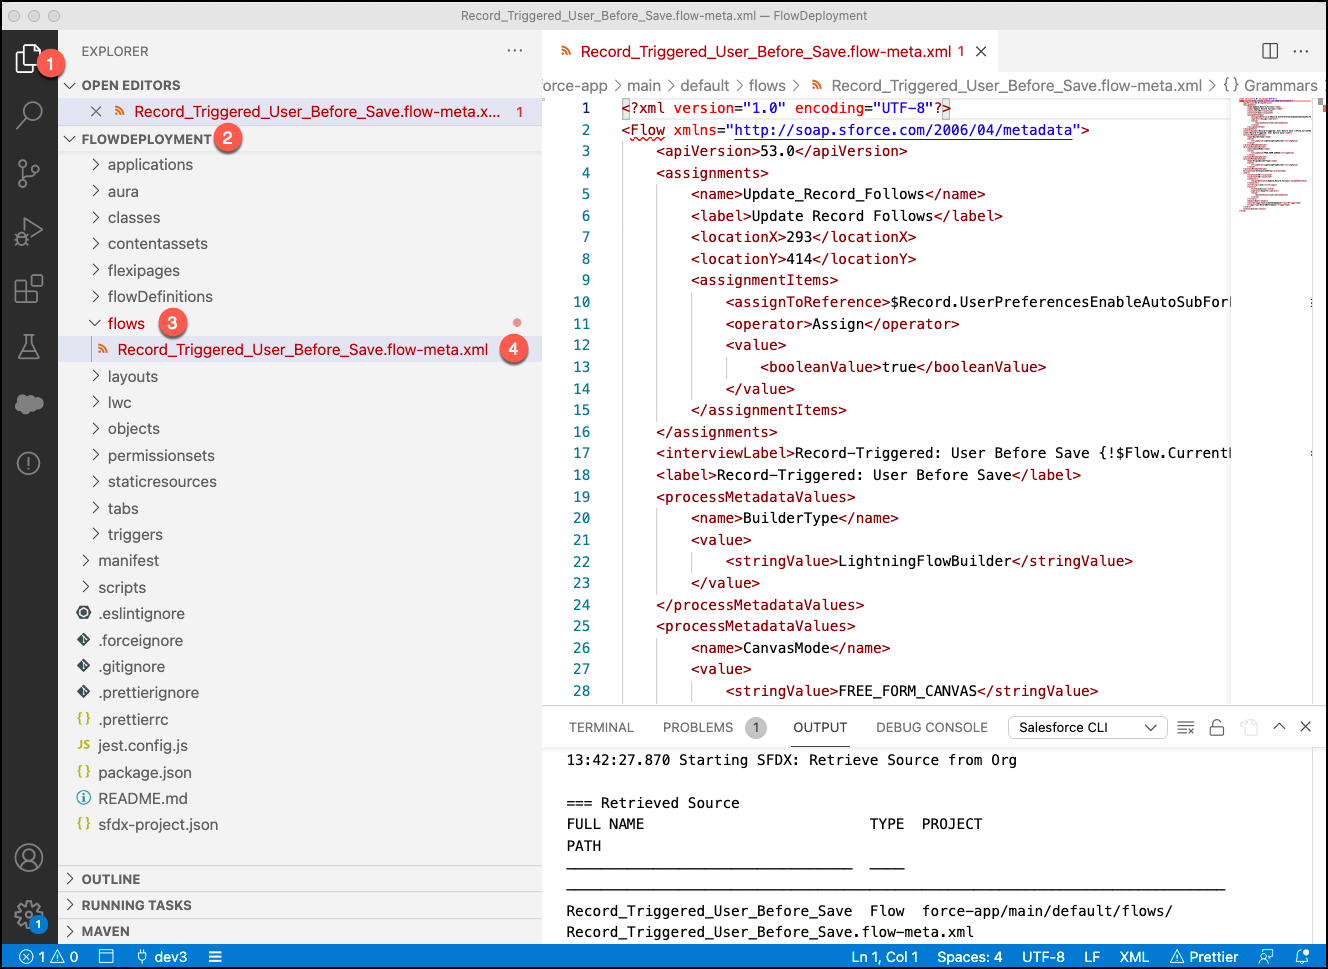
- The next step to retrieve the exact metadata components, which you want to deploy. In this demo, you’re going to deploy the Flow Record_Triggered_user_Before_Save. Navigate to the Org Browser and then expand on the Flow to download the Record_Triggered_user_Before_Save components, as shown in the following screenshot.

- Once you’re done with components download, navigate to Explorer | Project | Flow.
- Your project should now look like the following screenshot.

- The next step is to deploy it in our Dev4 Sandbox environment. Before going ahead let’s take a minute pause here.
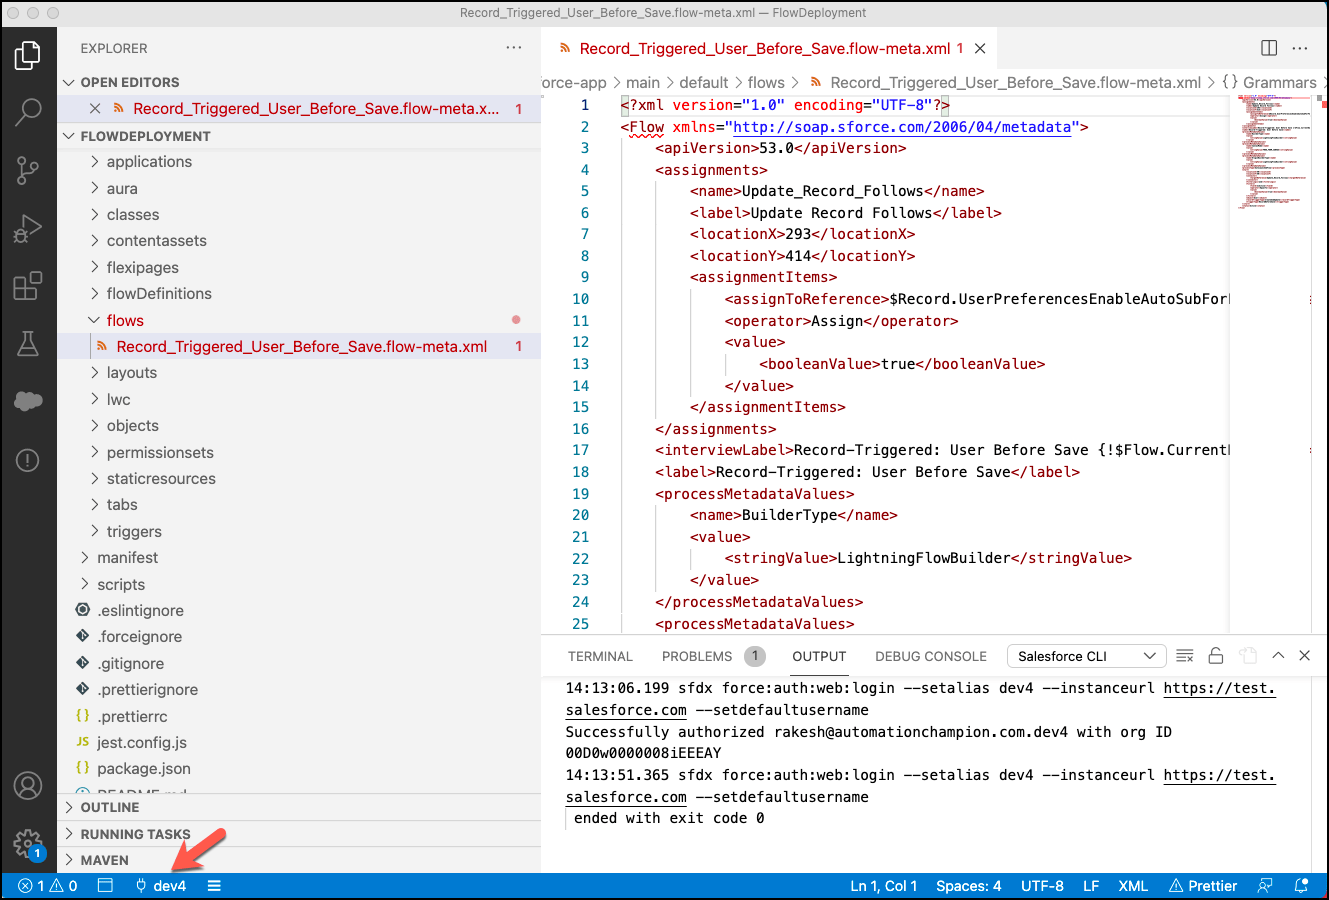
- It’s time to authorize Target Org, i.e. Dev4 in the scenario:
- Navigate to Visual Studio Code, click on View | Command Palette.
- Select SFDX: Authorize an Org, select the Sandbox option.
- Enter the alias Dev4 and press Enter.
- Follow on screen instructions to grant your org access to the connected app.
- In the end, make sure that you’re connected to right org i.e. Dev4 in this scenario.

- Right click on the component, then click on the SFDX: Deploy to Source Org button to deploy the Flow to Dev4.

- After successful deployment, you will get the message shown in the following screenshot.


Proof of Concept
At long last, here comes the final step

Formative Assessment:
I want to hear from you!
What is one thing you learned from this post? How do you envision applying this new knowledge in the real world?
Let me know by Tweeting me at @automationchamp, or find me on LinkedIn.


Thanks! So much. So I used Force.com IDe with Exclipse and followed all the steps. i got the successful Deployment message with 2 warnings about code coverage results. I did not see the update in my production org. I had deleted an APEX Class. NOte: I was able to delete two other classes just before this using the same methed. Any suggestions? Also the Class I am trying to delete has code coverage of over 80%.
Don’t forget to active the Process by clicking on the Activate button.