

Last Updated on March 20, 2022 by Rakesh Gupta
Objectives:
After reading this blog post, the reader will be able to:
- Create a list view in Lightning Experience
- Mass update records using list view
Create a List View
In Salesforce you can create a list view to filter out records based on any field that you have access to. For example, you want to see a list of accounts where Account Site = Dallas. To create a list view follow the below steps
- Click on the Account tab
- Under the LIST VIEW CONTROLS click on the New.

- If you don’t see New, It means you don’t have the Create and Configure List Views permission.
- It will pop up a window where you have to enter the list view name and share details.

- Once you’re done, click on Save.
- Specify Filter Criteria, as below:
- Filter by owner: All accounts
- Account Site = Dallas

- Once you’re done, click on Save.


Note:- you can choose up to 15 fields to display as columns.
Enable Inline Editing
After enabling Inline Editing and Enhanced Lists features, you can even edit certain fields right in the lists. To enable these features to follow the below steps:
- Click on Setup | User Interface | User Interface.

- Select the following checkboxes
- Enable Inline Editing
- Enable Enhanced Lists
- Once done, click on Save.

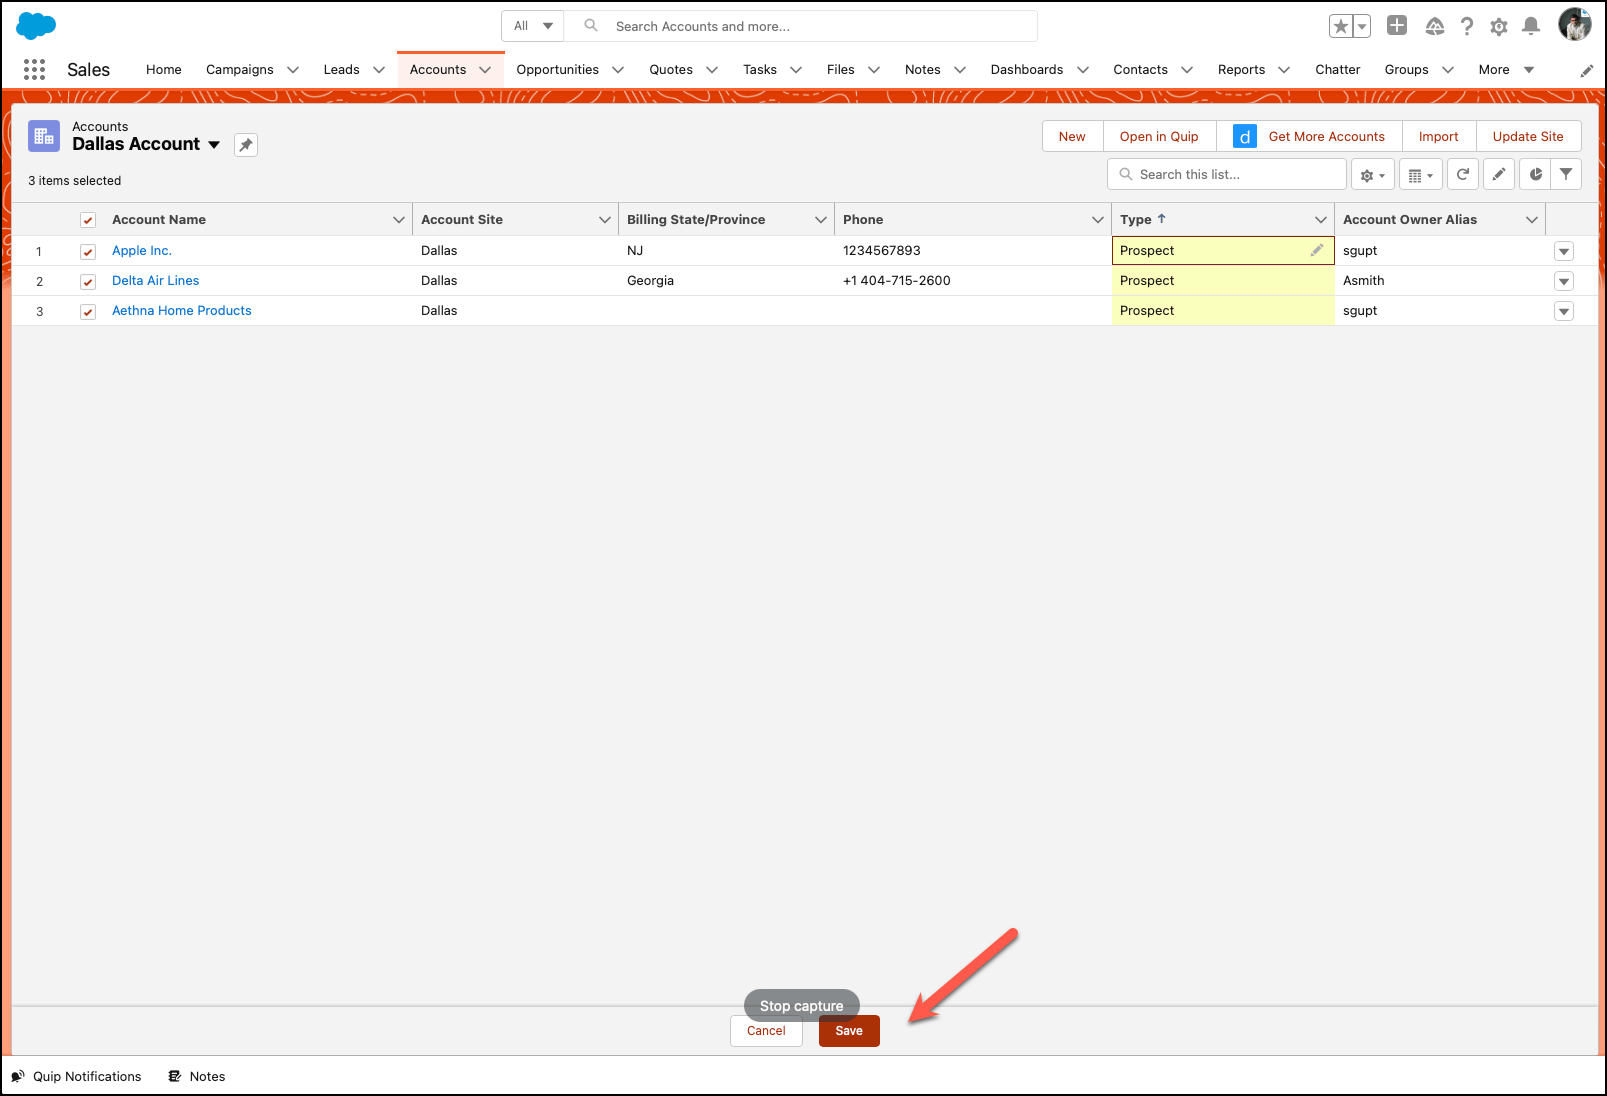
Mass Update Records Through Enhanced List View
Perform the steps below to mass update records via enhanced list view.
- Select the records you want to update. you can select up to 200 records at one time to edit.

- Editable cells display a pencil icon when you hover over the cell, Click on the field that you want to update. Now double click on the field that you want to update. In our case, I am going to update the Type field.

- You can select the value from the drop-down, in this case, Prospect.
- Select Apply to changes for just one record or all selected records. In this case, I selected All 3 selected records

- Select Apply to changes for just one record or all selected records. In this case, I selected All 3 selected records
- Once done, click on Apply.
- In the end, click on the Save button.

- Selected records will be updated.


Note:- Some standard fields don’t support inline editing. For example, Case Status, Opportunity Stage, Opportunity Amount, Opportunity Quantity and Lead Status, and most Task and Event fields can only be edited from a record’s edit page. If your organization uses record types, inline editing with lists is only available when all of the records in the list are of the same record type.
Formative Assessment:
I want to hear from you!
What is one thing you learned from this post? How do you envision applying this new knowledge in the real world? Feel free to share in the comments below.


and what if the check box in the action section has been removed. How do i add that back in?
Check out this knowledge article https://help.salesforce.com/apex/HTViewSolution?id=000003911