

Last Updated on February 13, 2024 by Rakesh Gupta
Big Idea or Enduring Question:
- How can you leverage Salesforce Reports and Dashboards REST API to automatically refresh a dashboard every hour or every minute in Salesforce using Salesforce Flow?
Objectives:
After reading this blog, you’ll be able to:
- Create a Connected App and Auth Provider.
- Create Named Credentials for outbound requests.
- Make an outbound HTTP PUT request using Salesforce Flow, eliminating the need for coding.
- Manage the outbound request response and implement appropriate actions.
- Run an Autolaunched Flow at regular intervals (for example, every 15 minutes, hourly, every four hours, etc.).
- Validate the integration and ensure the data flow works correctly.
- and much more.
👉 Previously, I’ve penned several posts on the topic of interfacing Salesforce with a diverse range of systems. Why not check them out while you are at it?!
- Generate Barcode and QR Code in Salesforce
- Integrate Salesforce with OpenWeatherMap Using Salesforce Flow
- Verify and Standardize Salesforce Addresses with Google’s Address Validation API
- Salesforce and Google’s Time Zone API Integration: Translating Coordinates into Time Zone Info
- Proactive Salesforce Monitoring: Periodically Checking if Salesforce is Down with the Salesforce Trust API
- Automate Currency Exchange Rate Updates in Salesforce using Currency Exchange API
Business Use case
Madison Campbell currently serves as a Salesforce Architect at Gurukul On Cloud (GoC). Madison has been instrumental in automatically updating current rates from the current Exchange Rate API for multi-currency functionality into Salesforce as part of the Sales Cloud rollout.
Now, the business wants Madison to address another critical item – they want a way to auto-refresh the ‘Sales Dashboard’ every 30 minutes. Currently, Salesforce only allows them to refresh only once.
Refresh a Dashboard
Salesforce offers two methods for updating dashboards: manual refresh and subscription-based refresh (Schedule refresh). The manual refresh option enables users to update their dashboard on demand, pulling the latest data directly from the Salesforce database. Alternatively, users can subscribe to a dashboard, scheduling automatic refreshes on a daily, weekly, or monthly basis. This subscription feature ensures that users regularly receive the most up-to-date information without needing to manually trigger each update.
The subscription-based refresh feature also known as Schedule Refresh, has certain limitations. Notably, it does not provide the flexibility to schedule dashboard refreshes at more frequent intervals such as every hour, every 30 minutes, or even every 6 hours, among other specific time frames. This means users are unable to automate dashboard updates at these shorter intervals.
In this blog post, we will delve deeply into how to address this challenge without writing a single line of code. I encountered this use case when someone posed it in the Trailblazer community. Finding it quite challenging, I was motivated to find a solution.
What is the Salesforce Reports and Dashboards REST API?
The Reports and Dashboards REST API provides programmatic access to your report and dashboard data as defined in the report builder and dashboard builder. This API enables integration of the data into any web or mobile application, both inside and outside the Salesforce platform. For example, it can be used to trigger a Chatter post with a snapshot of top-performing representatives each quarter.
The Reports and Dashboards REST API will revolutionize the way you access and visualize your data. You can:
- Integrate report data into custom objects.
- Define rich visualizations on top of the API to animate the data.
- Build custom dashboards.
- Automate reporting tasks.
At a high level, the API resources let you query and filter report data. You can:
- Run tabular, summary, or matrix reports synchronously or asynchronously.
- Filter for specific data on the fly.
- Query report metadata.
You can also work with dashboard resources to:
- Get a list of recently used dashboards.
- Get dashboard metadata and data.
- Query dashboard status.
- Refresh dashboards.
If you want to know more about the Salesforce Reports and Dashboards REST API, please go through the documentation.
How to Refresh a Dashboards Through REST API?
Use a PUT request on the Dashboard Results resource to trigger a dashboard refresh. The refresh response returns the URL of the status resource after the refresh is triggered. If filter parameters are included in the PUT request, only the filtered data will be refreshed.
The following PUT request refreshes the dashboard with the ID of 01ZB0000000hMW3MAM.
/services/data/v59.0/analytics/dashboards/01ZB0000000hMW3MAM
The response contains the status URL for the refreshed dashboard:
{
  "statusUrl" : "/services/data/v31.0/analytics/dashboards/01ZB0000000hMW3MAM/status"
}
Prerequisite
There are multiple prerequisites that need to be met before we can start configuring an HTTPS Callout from a flow.
Step 1: Install Schedul-o-matic 9000 App
The Schedul-o-matic 9000 app offers the flexibility of custom repeat intervals. Whether it’s running a flow once, every 5 minutes indefinitely, or any time frame in between, the choice lies in your hands.
Read this article to understand and get step-by-step instructions, as well as reasons why we’re using the Schedul-o-matic 9000 app.

Step 2: Create a Connected App
A connected app is a framework that enables an external application to integrate with Salesforce using APIs and standard protocols, such as SAML, OAuth, and OpenID Connect. Connected apps use these protocols to authenticate, authorize, and provide single sign-on (SSO) for external apps.


Step 3: Create an Auth Provider


Step 4: Configure an HTTP PUT callout for Report and Dashboard REST API
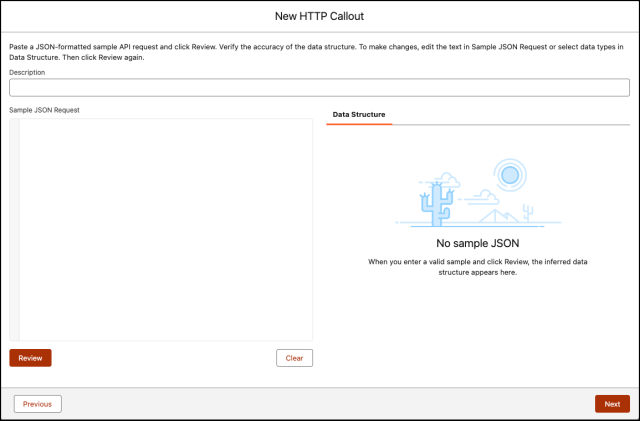
HTTP Callout guides you through entering the details about the HTTP web-based service or REST API endpoint you’re connecting to. After you complete the configuration, you invoke the action in a flow.
- On Flow Designer, below the Yes node, click on the +icon and select the Action element.
- Click + Create HTTP Callout.
- Configure the external service that connects Salesforce to the HTTP-based API.
- Enter a Name for the external service.
- Select the named credential that you created in Step 4 (Prerequisite).

- Click Next.
- The next step is configuring the invocable action that you can use in Flow Builder or across Salesforce.
- For Label, enter the action that the callout performs.
- Method: PUT
- Add the URL endpoint for the request.
- URL Path: /services/data/v31.0/analytics/dashboards/{DashboardID}
- Data Type: String
- Description: The ID of the dashboard to be refreshed

- Click Next.
- Click Next.
- For Sample Response Method select Connect for Schema.
- Click Next.
- Paste Sales Dashboard Id in DashboardID key.
- Click Connect.
- If successful, you will receive a response. Make sure to confirm that the Apex data structure is correct.

- Click Save.
-
Flow Builder creates the action and external service. The action is available in the Actions window in the flow.
-
The next step is to add the apex action generated by the HTTP Callout setup in the previous steps. We will use the Action element.
- Label the new action Refresh Dashboard.
- Set Input Values
- DashboardID: {!Get_Dashboard.Id}
- DashboardID: {!Get_Dashboard.Id}
- Click Done.


In the end, Madison’s Flow will look like the following screenshot:
Once everything looks good, perform the steps below:
- Click Save.
- Enter Flow Label (Refresh Dashboard) the API Name will auto-populate.
- API Version for Running the Flow: 60

- Click Done.

Step 5: Schedule the Flow to Run Every 30 Minutes
Now, we will use the Schedul-o-matic 9000 app to run the auto-launched flow we just created every 30 minutes.


Thanks for such useful post Rakesh. I have a question, I have the requirement to enable the CFO to refresh a Dashboard more often than once per minute (in fact, he wants to be able to have it refreshed every time he pushes the refresh button). I tried dabbing into creating a LWC that leverages the Dynamic API and uses PUT to have the dashboard refreshed. However, even after using this approach, I see that it still refuses to refresh until a minute has passed. Do you have any suggestions on how to approach this? is this even doable?
Thanks
Less than one minute refresh is not possible.
It looks like it doesn’t work for Dynamic dashboards. Upon creation, only the user that created it has it refreshed – everyone else doesn’t have it automatically refreshed.Any idea whether this is the case, or is there something to fix this please?
I have error : BAD_REQUEST”, “message”: “The current user of this dashboard is inactive. Your system administrator must select an active user for this dashboard.”}])
It’s me, the current user Administrator !!
hi, I have this error :
BAD_REQUEST”, “message”: “The current user of this dashboard is inactive. Your system administrator must select an active user for this dashboard.”}])
The current user its me administartor !!
You have an Inactive User listed as the “Running User” for the dashboard you are trying to view. You’ll need to update this User to view the dashboard.
Hi Rakesh, I set this up and it works for me, but it does not work for other people.
I tested with another admin account in our org. Specifically, for other users, the flow finds the correct dashboard and says it runs the Refresh Dashboard REST API flow action, but the dashboard is not actually refreshing for them. I assume it has to do with the API. Do you know what might cause this?
Is it a dynamic dashboard, or is the dashboard refreshing through a single user?
Followed all of the above steps. Can run and debug the flow with no errors however the dashboard is not being refreshed. On the action element when debugging the flow I see the following:
2XX (RefreshDashboard_Dashboardx20RESTx20API_OUT_2XX : { “statusUrl_set” : true, “statusUrl” : “/services/data/v31.0/analytics/dashboards/SALESFORCEID/status” })
responseCode (201)
Please use the Debug log to find out what is happening behind the scenes.
I have followed all the steps listed and I am able to Run and Debug the flow with no errors. The issue is nothing happens when the flow runs. The dashboard does not refresh. Am I missing something? When I debug the flow I see the following output on the Refresh Dashboard Action:
2XX (RefreshDashboard_Dashboardx20RESTx20API_OUT_2XX : { “statusUrl_set” : true, “statusUrl” : “/services/data/v31.0/analytics/dashboards/SALESFORCEID/status” })
responseCode (201)
I am also able to log into workbench and use the PUT request example listed at the top of the article and refresh my dashboard that way.
Hi Rakesh,
I tried your approach but i am receiving “”[{\”message\”:\”Session expired or invalid\”,\”errorCode\”:\”INVALID_SESSION_ID\”}]” error after configuring till Step 4: Configure an HTTP PUT callout for Report and Dashboard REST API. Can you please brief about named credential configuration that you did your org?
Please let me know if you still need help resolving the session expired error.
Does this work for Dynamic dashboard with viewer selected as “Logged in user”
Yes
Does this refresh work for Dynamic dashboards?
Yes
Getting error: OAUTH_APPROVAL_ERROR_GENERIC : An unexpected error has occured during authentication. Please try again.
Getting error: OAUTH_APPROVAL_ERROR_GENERIC : An unexpected error has occured during authentication. Please try again.
There might be many reasons for the error “Getting error: OAUTH_APPROVAL_ERROR_GENERIC”. Check out similar posts from StackExchange: https://salesforce.stackexchange.com/questions/99900/oauth-issue-oauth-approval-error-generic
Will this also work if the dashboard is open on the screen?
My scenario is that I would like to see live metrics along the day with a 30 min refresh
Yes, but users have to reload the page to see the changes.
Getting error: OAUTH_APPROVAL_ERROR_GENERIC : An unexpected error has occured during authentication. Please try again.
It’s showing like authentication is pending while setting up new legacy. reason why?
I created the Named Credential but I do not see the allow access page on save
Let me know if you are still having this issue.