

Last Updated on February 6, 2025 by Rakesh Gupta
Big Idea or Enduring Question:
- How do you log emails sent with the ‘send email’ action?
Objectives:
After reading this blog, you’ll be able to:
- Use record-triggered flow to send out an email alert.
- Use the “Send Email” flow action.
- Use email template with the “Send Email” action without creating an email alert.
- Log emails sent with the “Send Email” action.
- And much more.
👉 Previously, I’ve penned several posts on how to send email alert using Salesforce Flow. Why not check them out while you are at it?!
- Email Notification on Password Expiration
- Want to Send an HTML Email from Salesforce Flow? Oh, yes! It can be done!
- Send a Welcome Email with Attachments to New Users Using Salesforce Flow
- Custom Email Notification for Completed Tasks
- Email Notification on Topic Assignment
Business Use case
Benjamin Moore, a Salesforce Administrator at Gurukul On Cloud (GoC), has been assigned a specific task. Once a case is successfully closed, he should:
- Send out an email alert to the customer asking for their feedback.
- Log the sent email in the case and contact records for future reference.
Automation Champion Approach (I-do):
With the latest release from Salesforce, now it is possible to automatically log emails to a record’s Activity Timeline when using the Send Email action. This enhancement offers users the flexibility to:
- Log emails to recipient records – this encompasses leads, contacts, and person accounts.

- Log emails to non-recipient records, such as accounts, cases or opportunities.

- Conveniently log emails to both recipient and non-recipient records simultaneously.


Prior to this release, emails sent using the Send Email action couldn’t be automatically tracked in Activity Timelines. As of Spring’24 release, it is not possible to log emails sent to users; otherwise, you will get an error.
saveAsActivity must be false when sending mail to users. WhatId is not available for sending emails to UserIds.
Before proceeding, you should become familiar with the EmailTemplate object in Salesforce. It represents a template for an email, mass email, list email, or Sales Engagement email. Supported in first-generation managed packages only.
| Field Name | Details |
| Name | Name of the template. Label is Email Template Name. |
| RelatedEntityType | When UIType is 2 (Lightning Experience) or 3 (Lightning ExperienceSample), RelatedEntityType indicates which entities this template can be used with. Valid values are the entity API name: “Account” for account, “Contact” for contact, “Opportunity” for opportunity, “Lead” for lead, and so on. The value can be any entity the user has read access to (including custom entities) but not virtual entities, setup entities, or platform entities. |

Let’s begin building this automation process.
Guided Practice (We-do):
There are 6 steps to solve Benjamin’s business requirement using Record-Triggered After-Save Flow. We must:- Create an email template
- Define flow properties for record-triggered flow
- Add a decision element to determine if the case has been closed
- Add a get records element to find the email template
- Add a decision element to check if the email template was found or not
- Add send email action – to send and log the email
Step 1: Create an Email Template
- From the App Launcher, find and select Email Templates.
- Clicks on the New Email Template.
- Enter a Name, Related Entity Type, Folder, Subject and Body for your email template.
- Save your template when you’re done.


Step 2: Define Flow Properties
- Click Setup.
- In the Quick Find box, type Flows.
- Select Flows, then click on the New Flow.
- Select the Record-Triggered Flow option, click on Create
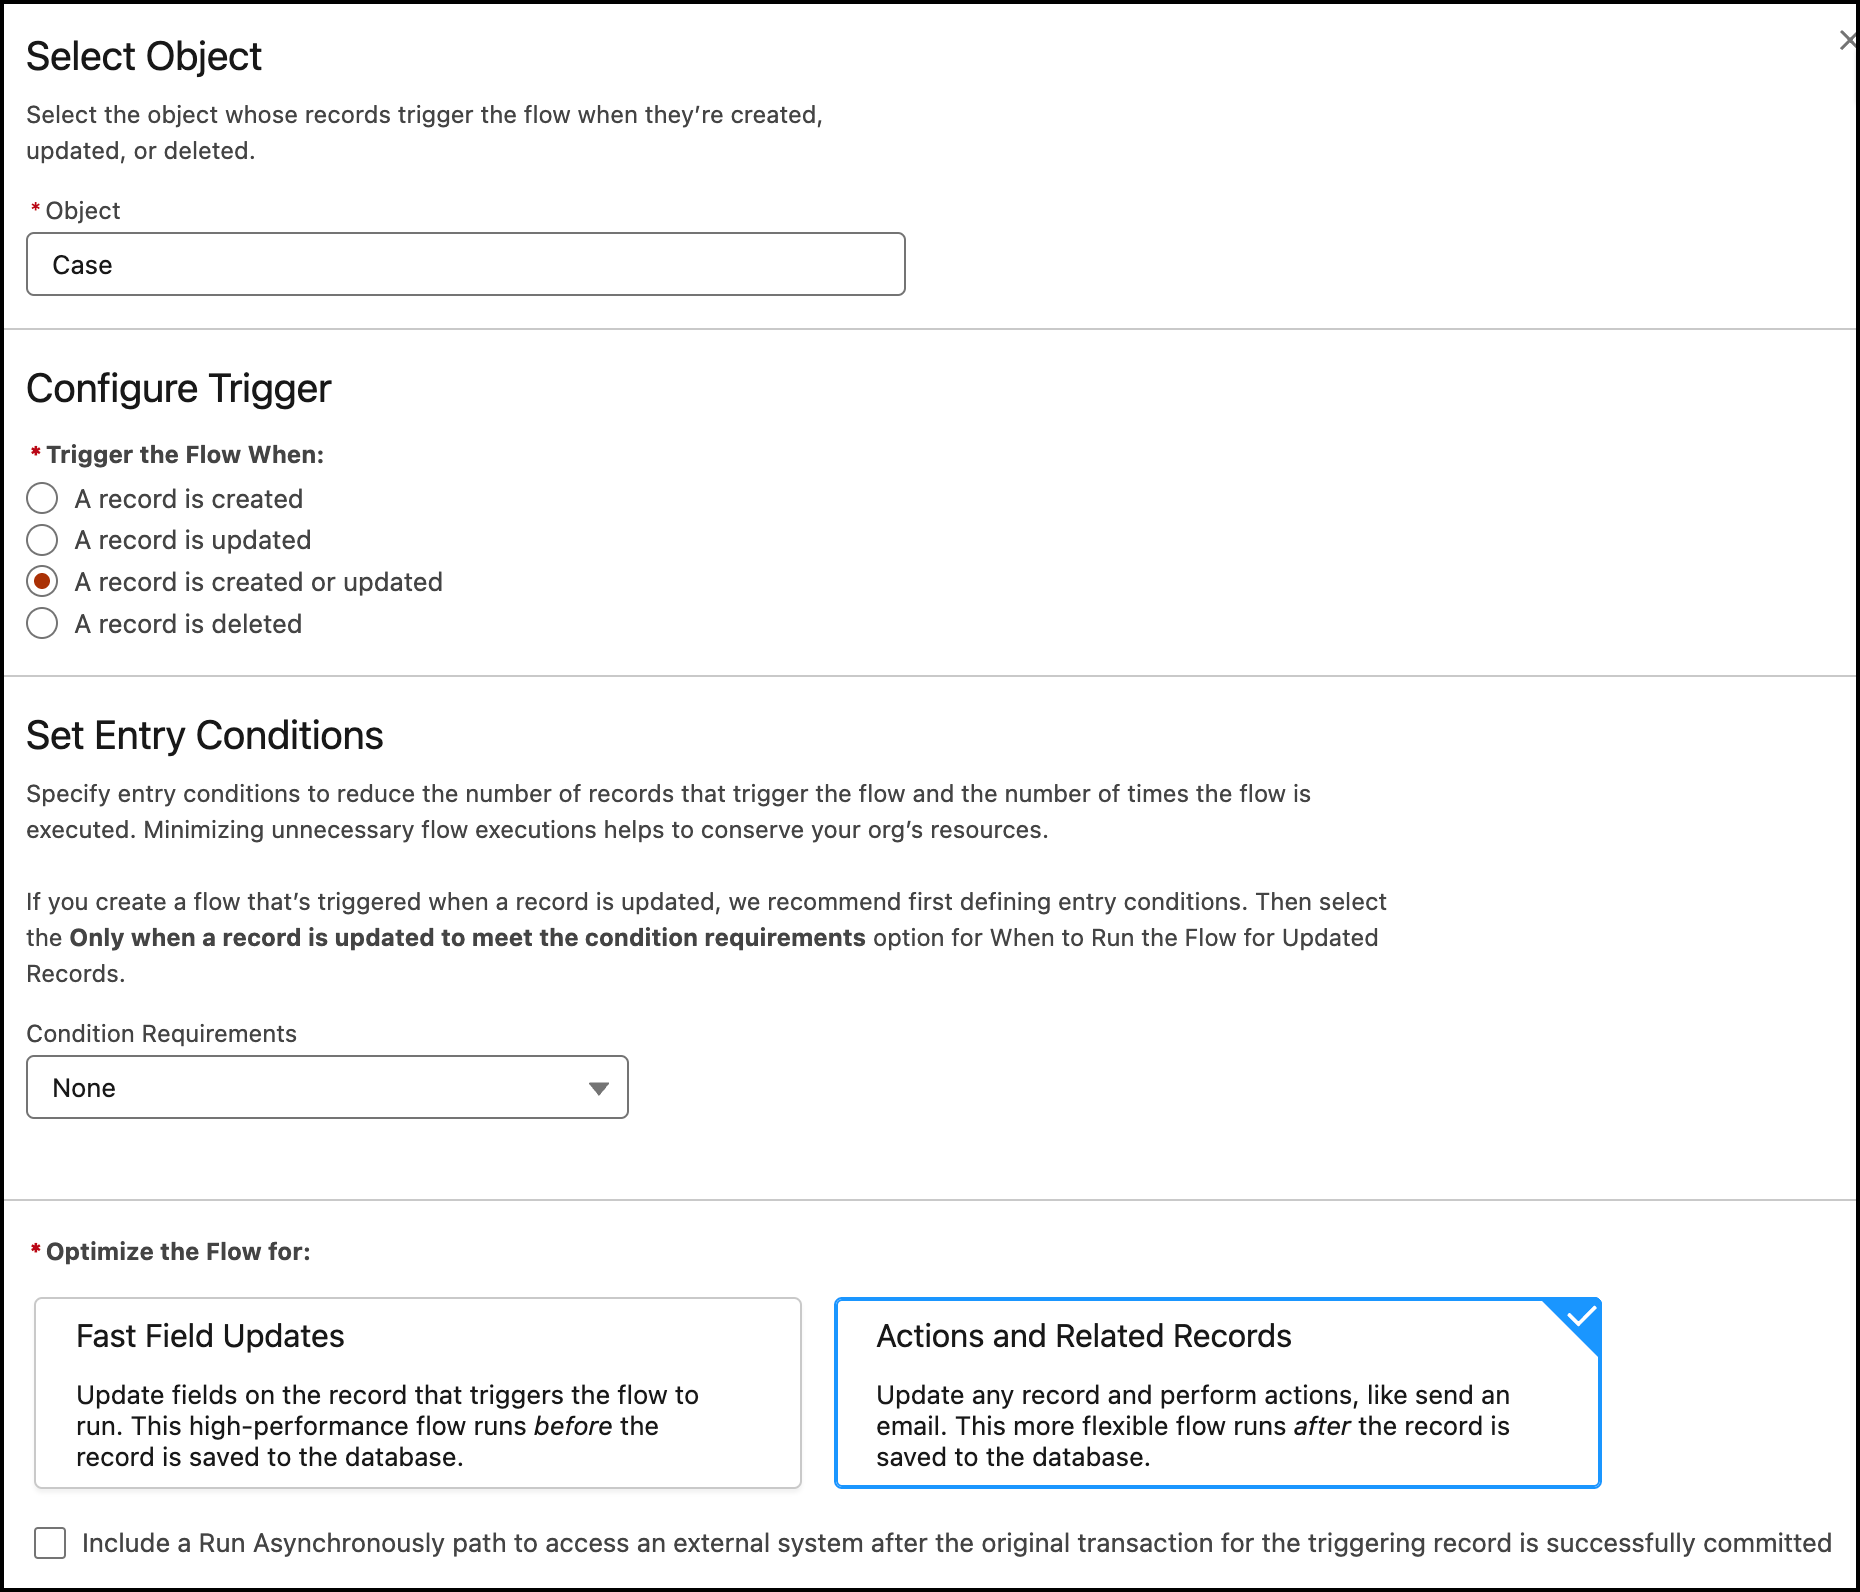
- Object: Case
- Trigger the Flow When: A record is created or updated
- Set Entry Conditions: None
- Optimize the Flow For: Action and Related Records
- Click the X at the top to save your changes.

Step 3: Using Decision Element to Check If the Case Has Been Closed
Now we will use the Decision element to check if the case was closed or not.
- On Flow Designer, click on the +icon and select the Decision element.
- Enter a name in the Label field; the API Name will auto-populate.
- Under Outcome Details, enter the Label the API Name will auto-populate.
- Condition Requirements to Execute Outcome: All Conditions Are Met (AND)
- Row 1:
- Resource: {!$Record.IsClosed}
- Operator: Equals
- Value: {!$GlobalConstant.True}
- Row 1:
- When to Execute Outcome: Only if the record that triggered the flow to run is updated to meet the condition requirements
- Click Done to save your changes.


Step 4: Adding a Get Record Element to Find the Email Template
The next step is to use the Get Records element to find the email template created in step #1.
- On Flow Designer, below the Decision node, click on the +icon and select the Get Records element.
- Enter a name in the Label field; the API Name will auto-populate.
- Select the EmailTemplate object from the dropdown list.
- Select All Conditions Are Met (AND).
- Set Filter Conditions
- Row 1:
- Field: Name
- Operator: Equals
- Value: Case Closure Feedback Request
- Row 1:
- How Many Records to Store:
- select Only the first record
- How to Store Record Data:
- Choose the option to Automatically store all fields.
- Click the X at the top to save your changes.


Step 5: Using Decision Element to Check If the Email Template Was Found or Not
Now, we will use the Decision element to check if the previous Get Records element returns email template or not..
- On Flow Designer, click on the +icon and select the Decision element.
- Enter a name in the Label field; the API Name will auto-populate.
- Under Outcome Details, enter the Label the API Name will auto-populate.
- Condition Requirements to Execute Outcome: All Conditions Are Met (AND)
- Row 1:
- Resource: {!Get_Email_Template}
- Operator: Is Null
- Value: {!$GlobalConstant.False}
- Row 1:
- When to Execute Outcome: If the condition requirements are met.
- Click Done.


Step 6: Add Action – Send and Log Email Alert
Now we will use the Send Email static action to send out an e-mail alert and log email.
- Under the Found node, click on the +icon and select the Action element.
- Search and select the Send Email from the dropdown menu
- Label the new action Feedback Request Email to Client
- Set Input Values
- Email Template ID: {!Get_Email_Template.Id}
- Log Email on Send: {!$GlobalConstant.True}
- Note:- Indicates whether to log the email on the specified records’ activity timelines. Valid values are true and false. Default value is false, and the email isn’t logged. To log an email, you must specify a value in Recipient ID or Related Record ID. If Log Email on Send is set to true, it changes the API called by the action, which can impact your daily email-sending limit.
- Recipient ID: {!$Record.ContactId}
- Note:- The ID of a lead, contact, or person account to send the email to. If Log Email on Send is included, then Recipient ID is the ID of the record where the email is logged. If Email Template ID is included, then Recipient ID is required.
- Related Record ID: {!$Record.Id}
- Note:- The ID of a non-recipient record. For example, the ID of a case record. If Log Email on Send is included, then Related Record ID is the ID of a secondary record to log the email to. In this case, the email can’t be logged if Recipient ID is a lead record. If Email Template ID is included, then Related Record ID is the ID of the non-recipient record used to populate email template merge fields.
- Click the X at the top to save your changes.


In the end, Benjamin’s Flow will look like the following screenshot:Once everything looks good, perform the steps below:

- Click Save.
- Enter Flow Label the API Name will auto-populate.
- Click Show Advanced.
- API Version for Running the Flow: 59
- Interview Label: Log Emails Sent with the Send Email Action {!$Flow.CurrentDateTime}
- Click Save.

Almost there! Once everything looks good, click the Activate button.
Proof of Concept
- Send an email alert to the customer

- Log the email to the case, and

- Also log the email on the contact


Formative Assessment:
I want to hear from you!What is one thing you learned from this post? How do you envision applying this new knowledge in the real world? Feel free to share in the comments below.


There is a typo on this sentence “Now, we will use the Decision element to check if the previous Get Records element returns open opportunities”
Rakesh, I have a very similar situation that I’m still running into a problem with.
In place of the Case object, my object is Application. My email template has a merge field pulling in a field from the application. Other than that and not using the decision elements to verify if a record has been found or not, everything else is the same.
The problem though is this: when I update the application record, the flow is triggered but I get an error on the Send Email action. The error is: “WhatId is not available with saveAsActivity for sending emails to Leads.”
Salesforce doesn’t allow the use of a WhatId when sending an email to users. I found a similar post https://salesforce.stackexchange.com/questions/1816/whatid-when-using-custom-object
Can you relate this to multiple records?
Based on my understanding, No.
Its very important to note that if you are using the EmailTemplate in the Send Email action, your email will be counted against the daily email limit.
Excellent info. Thank you!
Why did you put the condition in a decision rather than entry criteria?
I adhere to a single flow per object per type (https://automationchampion.com/2021/12/08/one-flow-per-object-design-pattern/)