

Last Updated on April 15, 2019 by Rakesh Gupta
Process Builder is one of the most used declarative tools to automate business processes in Salesforce. To address multiple requirements, we create a process with multiple criteria nodes. For example – (1) if an opportunity is successfully closed by Sales representative then send an email to the customer with survey link; however, (2), in case of Lost Opportunity, post a message to Chatter Group UC Sales Reps.
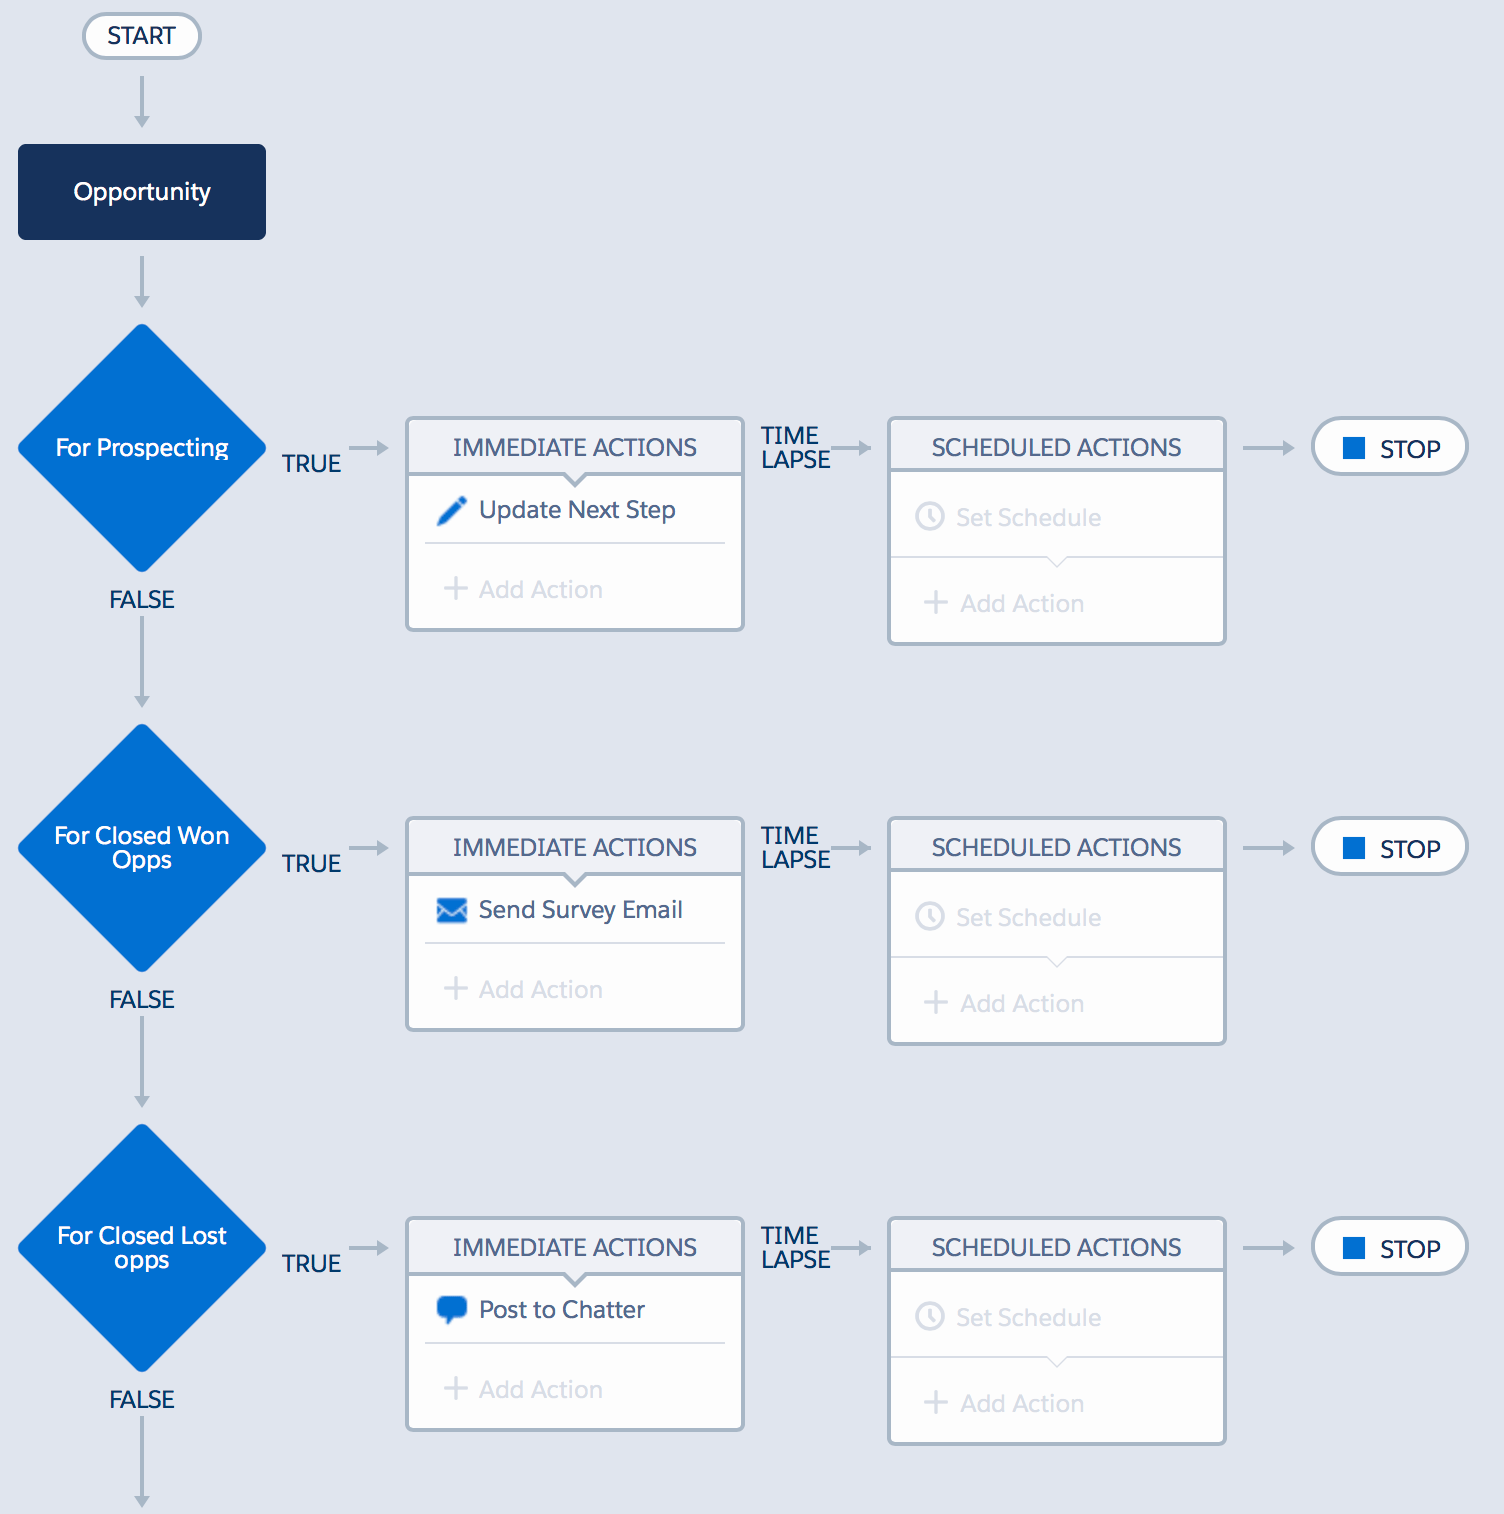
Criteria and actions are evaluated in the order shown on the process canvas. When a criteria is true, the process executes the associated action group and stops evaluating additional criteria unless you select EVALUATE THE NEXT CRITERIA option. When a criteria is false, the process skips the action group and evaluates the criteria for the next action group – as shown in the following screenshot. For instance, when a record meets criteria defined in nodes (1) or (2), the process executes the associated action group and then stops at either (3) or (4). It means, processes are designed to execute only one criteria node at a time – either (1) or (2) – in a single execution.

In the preceding screenshot, criteria node (1) will always execute in all cases. For example, suppose a Sales Representative updates Opportunity Stage to Closed Lost. In this scenario, the above process will fire and it will execute criteria node (1). Since the Stage update did not meet the criteria of node (1) – Closed Won – the process will jump to criteria node (2) – Closed Lost – and execute the associated action group – Immediate Actions (4).
Business Use Case
Let us start with a business use case. Pamela Kline is working as System administrator at GurukulOnCloud. At GurukulOnCloud they are using Process Builder to streamline Sales Processes. She has created the above-mentioned process to send an email to the customer with survey link when an Opportunity is successfully closed – Closed Won. However, in the case of ‘Lost Opportunity’, she would like the process to post a message to Chatter Group UC Sales Reps.
Today, Pamela received another requirement – as soon as an Opportunity is created with Stage (Prospecting), update Next Step field with the value – Setup a Call with the Customer.
Solution for the Above Business Requirement
It is quite easy to create a new process for the above business requirement; however, in this case, we will clone the existing process.
- Click on the Clone button available on the button bar. It will open a popup for you. Under Save Clone As, select Version of current process option. It will look like the following screenshot:

- Once you are done, click on the Save button.
- To meet your new business requirement, modify your existing process by adding third criteria node to the process – Set Opportunity Stage to Prospecting.
- For Criteria for Executing Actions, select Conditions are met
- Set condition – [Opportunity].StageName Equals Picklist Prospecting

- The next step is to add an Immediate action to Process. Click on Add Action (Under Immediate actions), Select the type of action to create (In our case Update Records), and then fill the values into fields to define the action – as shown in the following screenshot:

- Once you are done, click on the Save button.
- Your process will look as follows:
 To save execution time – now you can reorder your process criteria! It means, now you can execute criteria node (3) – Prospecting – before executing either criteria node (1) – Closed Won – or criteria node (2) – Closed Lost. This means that no subsequent criteria in your process will be evaluated if a new opportunity is created with Stage Prospecting.
 - To reorder the criteria node, just click the criteria node and action group (3) – Prospecting – and move it to the new location at the beginning of your process, as shown in the following video:

- Once you are done, click on the Save button, it will redirect you to Process canvas. Finally, the Process will look like the following screenshot:

- Don’t forget to active the Process by clicking on the Activate button.


Note: – I am grateful to Resco.net and Smartcloud.io for sponsoring my blog.
Technical Editor and Proofreader: - Munira Majmundar


