

Last Updated on February 10, 2022 by Rakesh Gupta
Salesforce Flow allows us to automate business processes by building applications, known as Flows. Using Flows, a user can collect information; or, they can update, edit, or create records in Salesforce. Furthermore, Flows can execute logic, interact with the Salesforce database, call Apex classes, Platform Events, and guide users through various screens to streamline the process of collecting and updating data. Once a Flow is built, an Admin can make the Flow available to the right users or systems. After Salesforce Recent release system administrator can create a Flow that can fire when a record is created or edited.
After recent release, however, with just a few clicks, users can now attach files Contract, or other Objects, via a Flow! For example, you can build a Flow that allows your sales rep to create a Contract and then attach a Contract PDF file through a Flow.
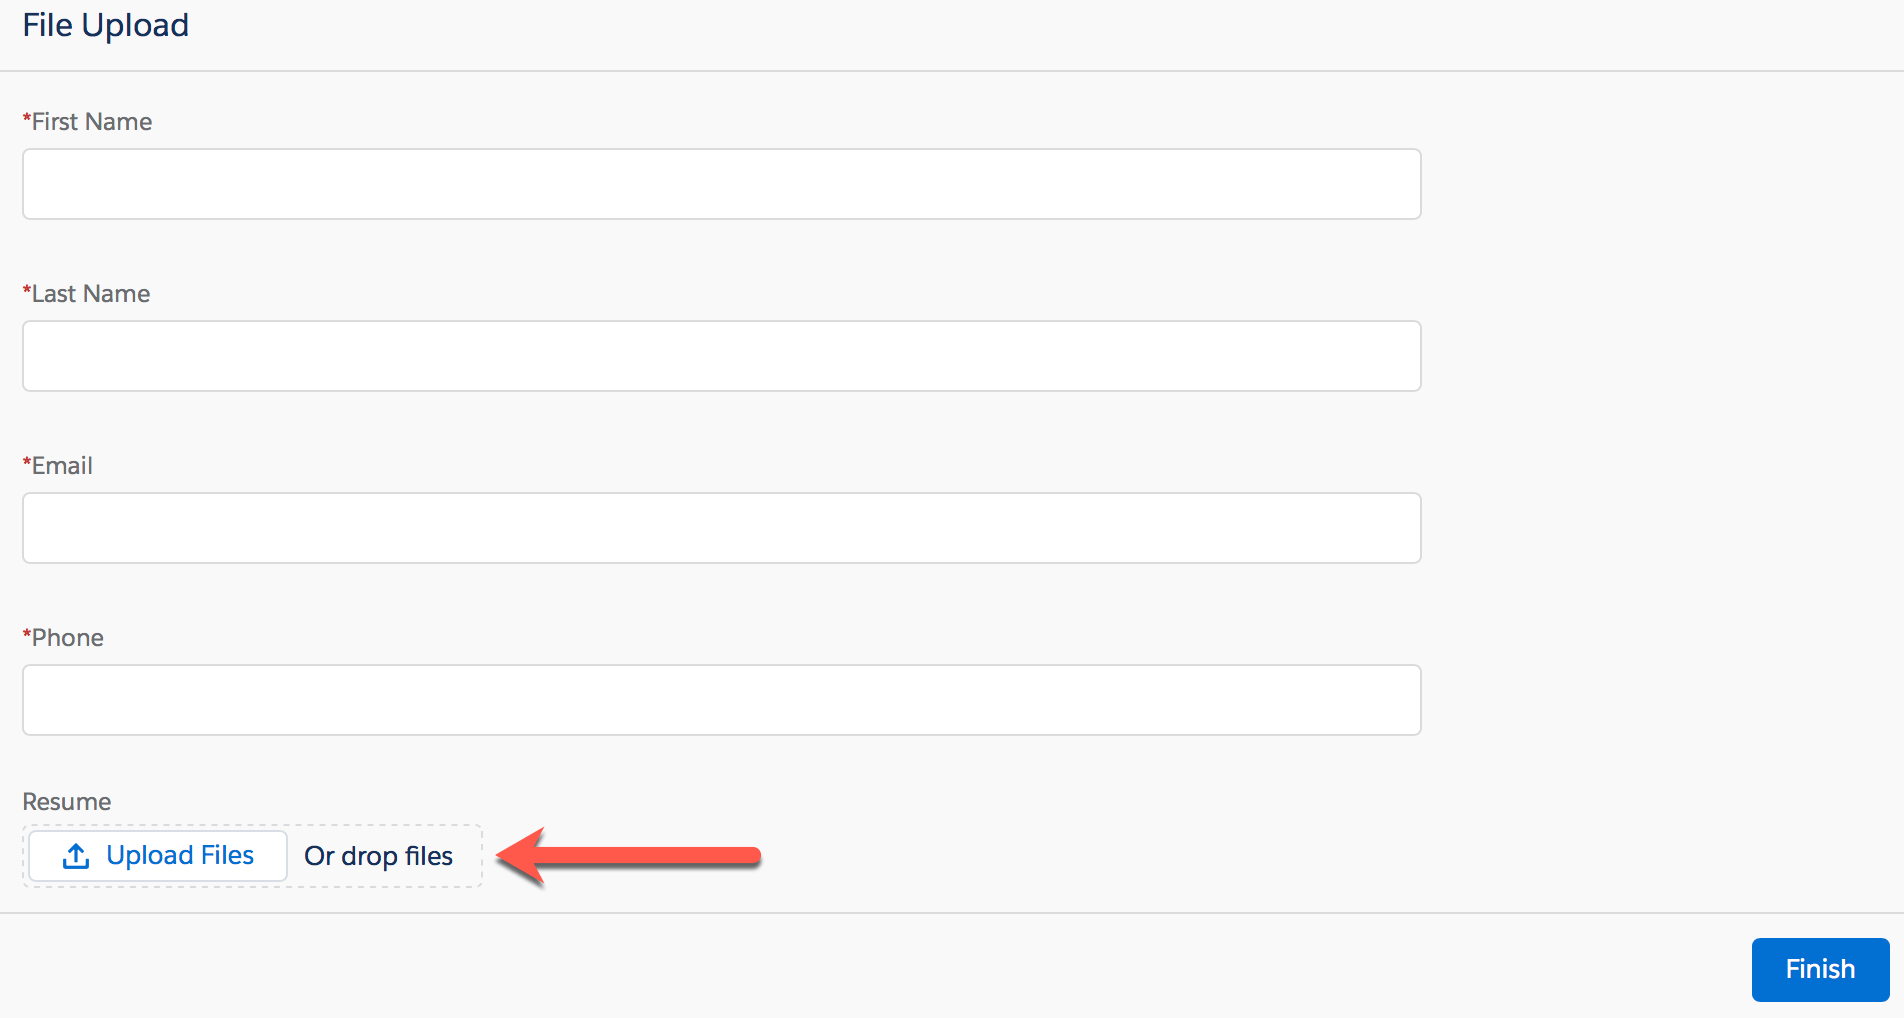
An Admin can allow users to upload files from a Flow by adding the File Upload (Screen Component) to a Flow’s screen, as shown in the following screenshot:
Furthermore, an Admin can also customize Accepted Formats in a Flow to further specify which image file formats a user can upload. However, note that any files, that are either non-images or are not in the Accepted Formats, cannot be uploaded! This change applies to the Lightning Experience and Salesforce iOS app. Also important to note here is that the File Lightning Component works only for Flows that use Lightning runtime.
In this article, I am going to show you how one can use the File component in a Flow and then make it available to business users. Let us start with a business use case.
Business Use Case
Edward Backhouse is a System Administrator at GurukulOnCloud (GoC). He received a requirement to create a Flow that allows reps to create Leads and upload their business cards from it. The requirement also includes the following tasks:
- Reps must be able to upload multiple Business Cards of prospects that belong to the same company
- And, secondly, the Reps must only be able to upload files of type .jpg, .png and, .Pdf.
Solution for the above business requirement
There are a few possible solutions for the above business scenario. For example, you can use Evernote or similar applications – that allow a user to scan business cards from mobile and auto-create leads into Salesforce. However, our purpose, in this blog, is to learn Flow and its advanced/new features. Therefore, we will use Flow and the new File lightning component to solve the above business requirement. To do so, follow the steps listed below:
- Navigate to Setup (Gear Icon) | Setup | Process Automation | Flows in Lightning Experience.
- Then click on the New Flow button and select Screen Flow it will open the Flow canvas for you.
- Create a sample Flow (add two components to store First name, Last Name, and Company) as shown in the following screenshot:

–> Remember, to create a Lead we need LastName and the Company information of prospects; for, these are required fields! However, feel free to add more fields if your use case calls for additional fields. - The next step is to use the Create Records element to insert the above lead into Salesforce. Click on the Palette tab and drag and drop the Create Records element onto the canvas; it will open a new window for you. Map the Record Create element according to the following screenshot:

- The next step is to add a File Upload Lightning component to our flow.
- Add one more screen element to your flow.
- On the Screen element, navigate to the Screen Components section and double-click on the File Upload field, to add it to the Screen element, as shown in the following screenshot:

- On the Screen preview pane, click on the File Upload field to configure its settings, as shown in the preceding screenshot:

- In the end, your Flow will look like the following screenshot:

- Save the Flow with the name Upload File – Example and close the canvas.
- Don’t forget to activate the Flow by clicking on the Activate button.


It’s time to test this feature
Now users can attach files to flow from any device (Salesforce iOS or Android).
If you have any problem with watching the video then, please click on it and open it in another tab.
I hope you can learn from the blog about how to upload files from a Flow!! Yes, go ahead! Show off your newly acquired skills to your friends, colleagues, and families!
Please feel free to add constructive comments, insights – and yes, challenges too! – to the blog. Good Luck in your Journey towards becoming a Salesforce Ninja!


I’m not being able to pull up the values in “create new records”. do i have to create a new resource?
Use the “Content Document IDs” attribute to extract the IDs of the uploaded files (Accept Text collection variable)
This is very helpful. Thank you!
After the user adds the file, the details are lost in the file till you open the record. How can I add columns to the related view of the file? User wants to know more about the file without opening the record to see the characteristics other than the file name. How can I add custom field as columns?
Hi
Thanks for the post!
Is it possible to have the File Upload in the same screen with all the other details? Before the Create Record element?
Yes, it is possible to have the File Upload on the same screen with all the other details and later associate it with the actual record. To achieve it – use Content Document IDs attributes from the File component.
Would it be possible to select file details as well? I’d like to have our users upload a file and select from a piclist in the File Details as well. This would help them categorize the types if items they are uploading.
Yes – feel free to add a drop-down on the screen and then map it back.
Hi Champ 🙂
I’ve added the component into the Flow, and it works nicely.
The only complain I got from users is that, after uploading the file, they don’t see the uploaded file, and they are not sure if they have to hit Next, as the screen looks the same before and afrter uploading the file…
Any suggestions?
Can we move to the next screen after hitting Done in the Upload Files screen?
We can assume they only need to upload one file..
How about adding some instructions on the screen?
HI,
I can see the component in the page setup.
Any idea?
Thank you.
Hi,
What about the output parameters? Could you give it?
Thank you.
I liked this example, however, how do you access the actual file names being referenced or give them unique names when allowing multiple updates. I’m also trying to have a validation to require a file be uploaded which is why I’m trying to get access to the actual file name to test that it’s not NULL. Can you provide some insight here?
Thanks.
Keith
There is an attribute Upload File Name to get the name of uoploaded file.
Okay I got it thanks.