

Last Updated on June 11, 2023 by Rakesh Gupta
Big Idea or Enduring Question:
- How to display records in a table using the datatable and process selected records?
Objectives:
After reading this blog, you’ll be able to:
- Understand how to use data table
- Works with Get Records element to fetch records
- Add columns to datatable
- Update multiple records using In operator
- And much more
Business Use case
Rachel Gillett is working as a Junior Developer at Gurukul on Cloud (GoC). She has received the following requirement from the management:
- Add a button on the account object that opens up a screen that allows sales reps to select multiple related open opportunities.
- Provide an option to select Stage for the selected opportunities.
- In the end, update the stage for selected opportunities.

Automation Champion Approach (I-do):
Salesforce Screen Flow DataTable is a powerful and smart table component provided by Salesforce Flow. It is a highly flexible component that displays information in tables and adds interactions to them.
There are a few possible solutions for the above business scenario. We will use Screen Flow and Data Table (Beta) to solve the requirement.
Before we proceed further, let us understand the characteristics of the DataTable component.
| Attribute | Details |
| Source Collection | Collection of records to use to populate the table. |
| Row Selection Mode | Indicates how many rows the user can select in the table. You can set the value to:
|
| Minimum Row Selection | Specifies the minimum number of rows that the user must select. |
| Maximum Row Selection | Specifies the maximum number of rows that the user can select. |
| Default Selection | The collection specifies which records to preselect in the table. |
| Require user to make a selection | Specifies the maximum number of rows that the user can select. Specifies whether the user must select a row before navigating to the next screen. |
Before discussing the solution, let me show you a diagram of a Process Flow at a high level. Please spend a few minutes going through the following Flow diagram and understanding it.

Let’s begin building this automation process.
Guided Practice (We-do):
There are 9 steps to solve Rachel’s business requirement using Screen Flow. We must:
- Define flow properties for screen flow
- Add a text variable to store the account Id
- Add a text collection variable to store the selected opportunity Ids
- Add a Get Records element to find the open opportunities
- Add a Screen element to display the records in a table format and a Stage drop-down
- Add a loop element to extract selected opportunities from the record collection variable (step 5)
- Add an assignment element to add opportunity Id to the collection variable (Created in step 1.3)
- Add an Update Records element to update the opportunity stage of selected records
- Create a Quick Action to Launch the Flow.
Step 1: Define Flow Properties
- Click Setup.
- In the Quick Find box, type Flows.
- Select Flows, then click on the New Flow.
- Select the Screen Flow option and click on Create and configure the flow.
- It will open the flow designer for you.
Step 2: Add a Text Variable to Store Account Id
- Under Toolbox, select Manager, then click New Resource to store the account Id.
- Input the following information:
- ResourceType: Variable
- API Name: recordId
- Data Type: Text
- Default Value: {!$GlobalConstant.EmptyString}
- Check Available for Input
- Check Available for Output
- Click Done.

Step 3: Add a Collection Variable Text to Store Selected Opportunity Ids
- Under Toolbox, select Manager, then click New Resource to store the selected Opportunity Ids.
- Input the following information:
- ResourceType: Variable
- API Name: varT_OpportunityIds
- Data Type: Text
- Default Value: {!$GlobalConstant.EmptyString}
- Check Allow multiple values (collection)
- Check Available for Input
- Check Available for Output
- Click Done.

Step 4: Adding a Get Record Element to Find the Open Opportunities
The next step is using the Opportunity object to find the open opportunities on the current account.
- On Flow Designer, click on the +icon and select the Get Records element.
- Enter a name in the Label field; the API Name will auto-populate.
- Select the Opportunity object from the dropdown list.
- Select All Conditions Are Met (AND).
- Set Filter Conditions
- Row 1:
- Field: AccountId
- Operator: Equals
- Value: {!recordId}
- Click Add Condition
- Row 2:
- Field: IsClosed
- Operator: Equals
- Value: {!$GlobalConstant.False}
- Row 1:
- How Many Records to Store:
- Select All record
- How to Store Record Data:
- Choose the option to Automatically store all fields.
- Click Done.

Step 5: Add a Screen Element to Display the Open Opportunities in a Table Format and a Stage Drop-down
- Under Get Opportunities Node, click on the +icon and select the Screen element on Flow Designer.
- Input the following information:
- Enter Label the API Name will auto-populate.
- Check out the video for step-by-step instructions and some tips.
Step 6: Add a Loop Element to Extract Selected Opportunity Records from Record Collection Variable (Step 5)
- On Flow Designer, click on the +icon and select the Loop element.
- Enter a name in the Label field; the API Name will auto-populate.
- For Collection Variable select {!Open_Opps.selectedRows}.
- For Specify Direction for Iterating Over Collection, select the option First item to last item.
- Click Done.

Step 7: Adding an Assignment Element to Add Opportunity Id to the Collection Variable Text (Created in step 1.3)
- On Flow Designer, click on the +icon and select the Assignment element.
- Enter a name in the Label the API Name will auto-populate.
- Set Variable Values
- Row 1:
- Field: {!varT_OpportunityIds}
- Operator: Add
- Value: {!Loop_through_Selected_Record.Id}
- Row 1:
- Click Done.

Step 8: Adding an Update Records Element to Update the Opportunity Stage of Selected Records
The next step is to update the opportunity stage of selected records. We will use the Update Records element.
- On Flow Designer, click on the +icon and select the Update Records element.
- Enter a name in the Label field; the API Name will auto-populate.
- For How to Find Records to Update and Set Their Values select Specify conditions to identify records, and set fields individually
- Object: Account
- Select All Conditions Are Met (AND).
- Set Filter Conditions
- Row 1:
- Field: Id
- Operator: In
- Value: {!varT_OpportunityIds}
- Row 1:
- Set Field Values for the Opportunity Records
- Row 1:
- Field: StageName
- Value: {!Stage}
- Row 1:
- Click Done.

In the end, Rachel’s Flow will look like the following screenshot:

Once everything looks good, perform the steps below:
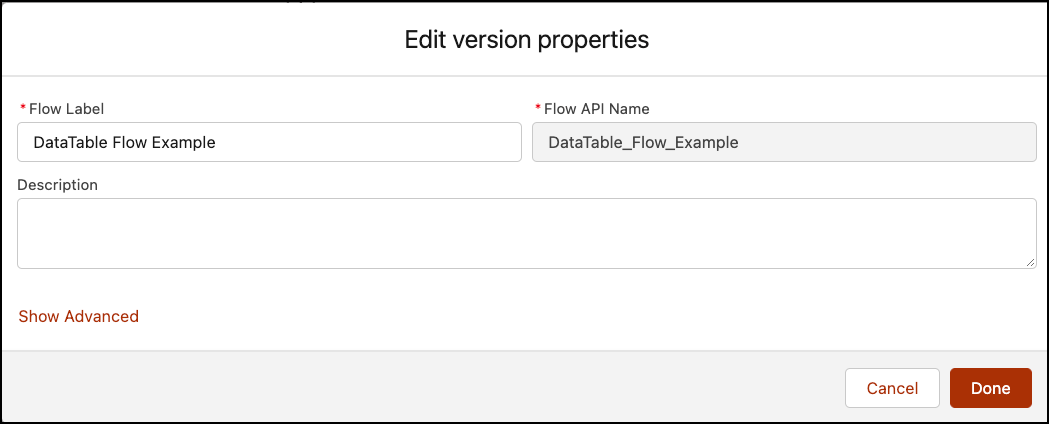
- Click Save.
- Enter the Flow Label the API Name will auto-populate.
- Click Show Advanced.
- API Version for Running the Flow: 56
- Interview Label: DataTable Flow Example {!$Flow.CurrentDateTime}
- Click Save.
Almost there! Once everything looks good, click the Activate button.
Step 9: Create a Quick Action to Launch the Flow
The next step is to create a Quick Action on the Account object to launch the Screen Flow. Salesforce will automatically pass the Account Id to the recordId variable.
- Click Setup.
- In the Object Manager, type Account.
- Select Buttons, Links, and Action, then click New Action.
- Input the following information:
- Select Flow as Action Type.
- Select DataTable Flow Example as Flow.
- Enter Label (Update Opportunity) the Name will auto-populate.
- Click Save.

Make sure to add the Quick action to the Account Lightning Record Pages.
👉 Check out the video for step-by-step instructions.
Proof of Concept
From now onwards, whenever a user clicks on the Update Opportunity button, Flow will populate a screen with open opportunities.
Formative Assessment:
I want to hear from you!
What is one thing you learned from this post? How do you envision applying this new knowledge in the real world? Feel free to share in the comments below.


