


Last Updated on April 23, 2022 by Rakesh Gupta
Big Idea or Enduring Question:
How do you deploy Flows using Workbench?
Objectives:
After reading this blog post, the reader will be able to:
- Understand how to use Workbench to retrieve change set
- Understand how to use Workbench to deploy flows
- Understand how to use Workbench to deploy any components
- Deploy components to any org using Workbench
Business Use Case
Pamela Kline is working as a System Administrator at Gurukul on Cloud (GoC). She has developed a Flow (Welcome New Users by Default – Auto Follow them in Chatter!) in her Trailhead playground and is done with testing. Now, she wants to deploy the flow to her UAT Sandbox.
Automation Champion Approach (I-do):
Once you are done, with Flow development, the next step is to deploy it. There are many ways, through which, you can deploy or distribute, Flow(s), from one org to another:
- Change Sets
- Packages
- Visual Studio Code
- Workbench
- Force.com Migration Tool
This blog is a sequel to my previous blog – Distribute Flow(s) using the Visual Studio Code. In the previous blog, I discussed how to deploy Flow(s) to another sandbox using the Visual Studio Code.
Today, I am going to discuss how to deploy a Flow(s) using the Workbench. Workbench is a powerful, web-based suite of tools designed for administrators and developers to interact with Salesforce.com organizations via the Force.com APIs. Workbench allows users to describe, query, manipulate, and migrate both data and metadata in Salesforce.com organizations directly in their web browser with a simple and intuitive user interface. Workbench is free to use but is not an official Salesforce.com product.
Workbench also allows us to deploy the metadata components like Flows in different environments – such as Developer Sandbox, Production Org or Trailhead Playground.
Migrate Metadata Components using Workbench
Follow the instructions to create a Package and deploy it to another Salesforce org using Workbench.
- The very first step is to create an Outbound Change Set or Package in the source org, i.e. Trailhead Playground in this scenario. It doesn’t matter which option (Outbound Change Set or Package) have selected to go forward, as long as it contains all metadata components.
- Follow the instructions to create an Outbound Change Set.
- Follow the instructions to create a Package.
- Before proceeding ahead, make sure that the package you created in Trailhead playground looks like the following screenshot:

- The next step is to retrieve the package or change set using the workbench.
- Open the Workbench and log in with your Trailhead playground username and password.
- Make sure that you’ve selected the Production for Environment option.

- Navigate to the Migration tab and select the Retrieve option.
- Under Retrieve
- Package Names: Blog_50
- Single Package: Check
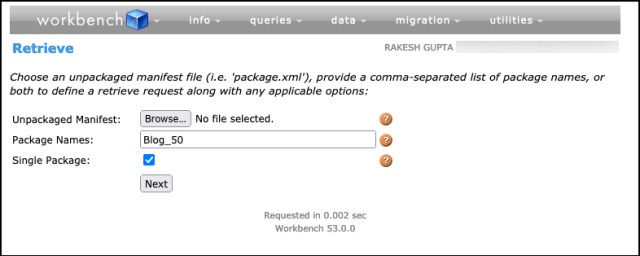
- Click Next.
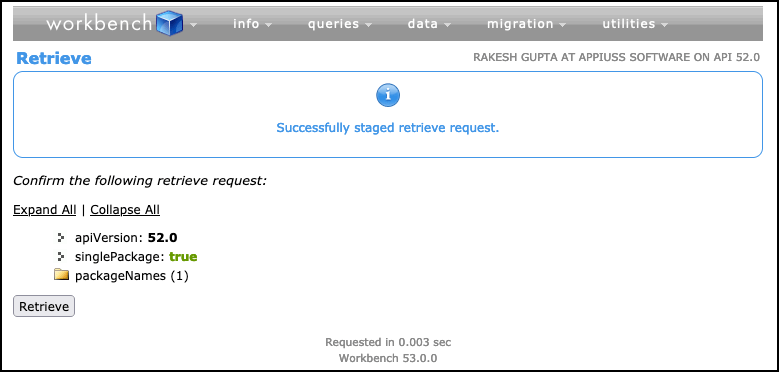
- Click Retrieve.

- Click Download Zip File and select your Desktop as the place to save the file so it is easy to find later on.

- In the end, logout from the Workbench.
- The last step is to upload the package to Pamela’s UAT Sandbox.
- Open the Workbench and log in with your UAT Sandbox username and password.
- Make sure that you’ve selected the Sandbox for Environment option.

- Navigate to the Migration tab and select the Deploy option.
- Under Deploy
- Browse: Select the ZIP file from your Desktop
- Auto Update Package: Check
- Single Package: Check
- Ignore Warnings: Check
- Test Level: NoTestRun

- Browse: Select the ZIP file from your Desktop
- Click Next.
- Confirm all of the options for deployment by clicking on the Deploy button.

- Wait for the process to become completed.
- After successful deployment, you will get the message shown in the following screenshot.


Proof of Concept
At long last, here comes the final step!

Formative Assessment:
I want to hear from you!
What is one thing you learned from this post? How do you envision applying this new knowledge in the real world? Feel free to share in the comments below.


what does Auto Update Package setting mean under the Migration tab for the Deploy option?
Allow Missing Files – If files that are specified in package.xml are not in the .zip file, specifies whether a deployment can still succeed.
Auto Update Package – If a file is in the .zip file but not specified in package.xml, specifies whether the file is automatically added to the package. A retrieve() is issued with the updated package.xml that includes the .zip file.
Ignore Warnings – Indicates whether deployments with warnings complete successfully (true) or not (false).
Single Package – Indicates whether the specified .zip file points to a directory structure with a single package (true) or a set of packages (false).