


Last Updated on February 10, 2022 by Rakesh Gupta
I hope everyone had a great time at Dreamforce – overflowing to the brim with lots of information, inspiration, and excitement to continue your learning after Dreamforce’18?! For my friends – who didn’t get a chance to attend the Dreamforce in person – here is an article summarizing Key takeaways from Dreamforce 2018!
At this Dreamforce, I had an opportunity, and honor, to share the stage with Alex Edelstein – Sr. Director – Salesforce.com, Inc – to present a session on Extend Lightning Flow with Lightning Components.

At the event, I gave a demo of how one can use Lightning components in the Salesforce Flow. In the demo, I used one Flow resource – Stage (Basically a Progress Bar/Path). After the session, many attendees asked me how did I build the path? So, I am writing this article to explain just that!
What is a Stage Resource in a Flow?
You can use the Stage resource to show progress through the flow screen element. It is also possible to reference the stages in flow logic. For example, in a partner registration flow, the stages are Tell us about yourself, Tell us about your company, Upload document, and Confirmation.

By default, standard, out-of-the-box Flow runtime, does not show a flow’s stages. But, you can add a custom Lightning component to visually represent the stages. Thanks to Salesforce.com Inc, the developer team for providing sample code (Lightning) to build a Progress Bar article – by so doing, they made your, and my, job very easy!
Let us start with a business use case.
Business Use Case
Edward Backhouse is a System Administrator at GurukulOnCloud. Edward received the following requirement from his manager – create a registration form which looks like the following screenshot:


A solution for the above business requirement
There are a few possible solutions for the above business scenario – for example, one can use 100% Lightning Components. We, however, will use both – Flow and Lightning Component – to solve the above business requirement. Before going ahead, let us first consider the pre-requisites for this solution:
- You must use MyDomain
- Make sure to enable Lightning runtime for flows
- Last but not the least, make sure you are using Lightning Experience
- First of all, create a progress bar Lightning Component as shown in this article. If you don’t know how to create a lightning component then please review this Trailhead module Quick Start: Lightning Components
- Navigate to Setup (Gear Icon) | Setup | Process Automation | Flows.
- Click on the New Flow button and select the Screen Flow option, then click on Create it will open the Flow Designer for you.
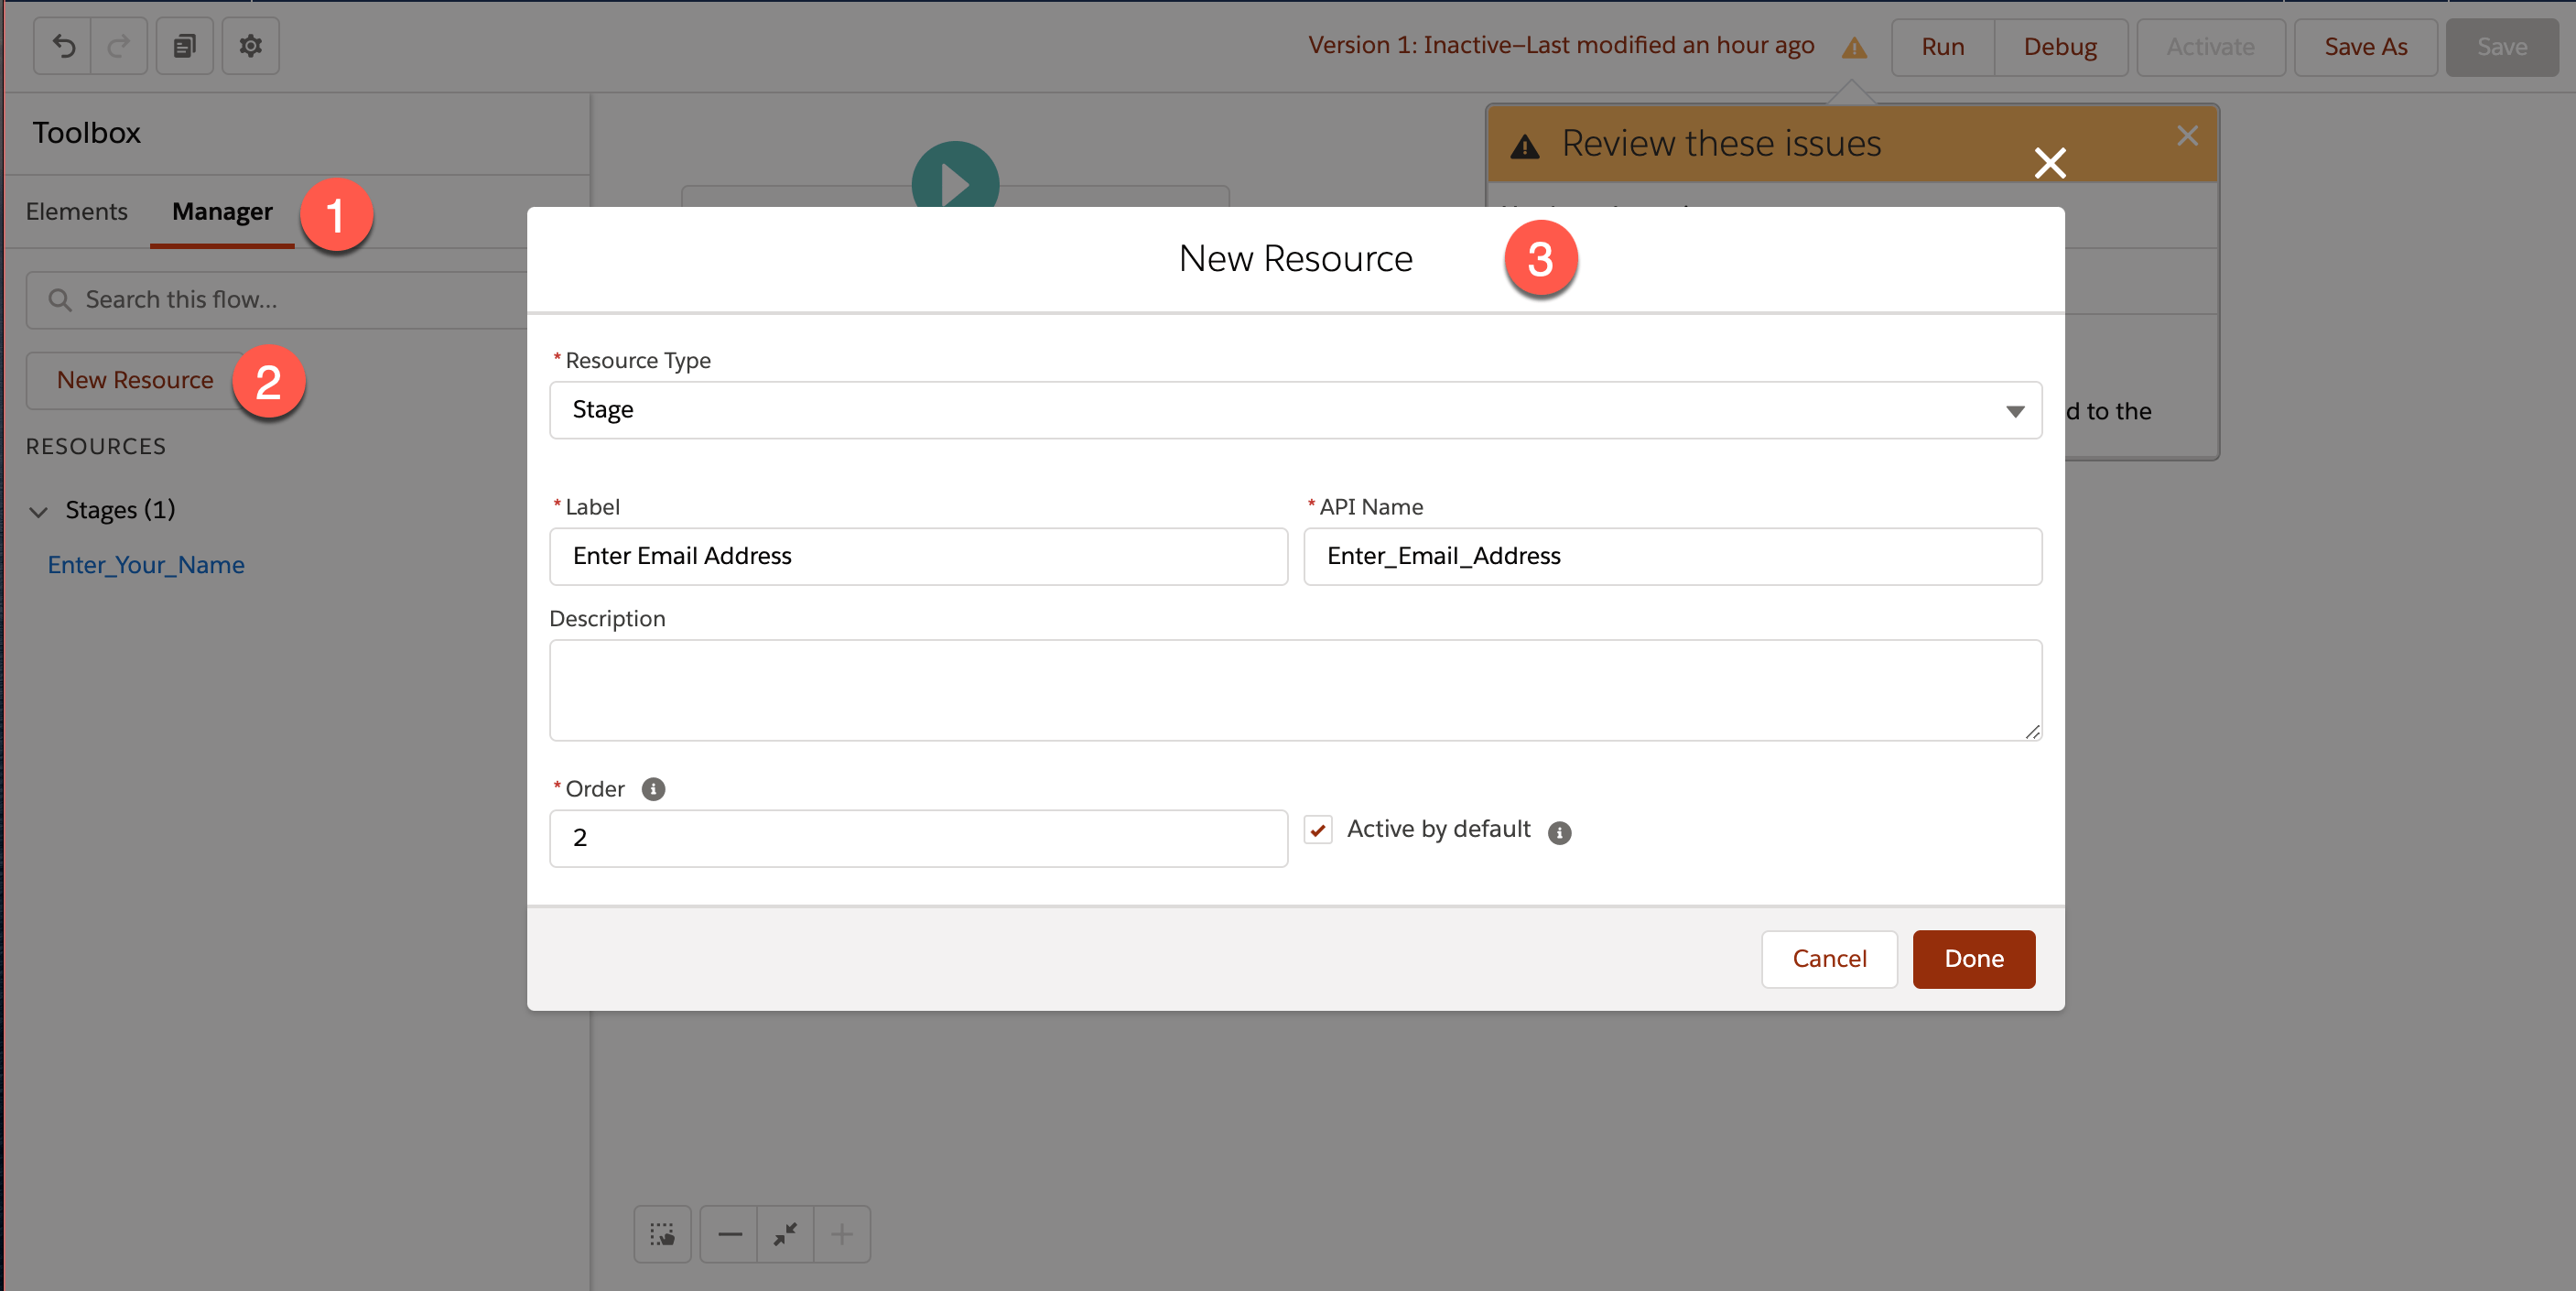
- Now, create Stages for the flow, as mentioned below:
- Enter Your Name
- Enter Email Address


- Next, we will use the Screen element to create a registration form. Drag and drop a Screen element onto the canvas. And then follow the steps below:
- On the Screen element, navigate to the Custom section and double-click on the FlowProgressBar (A component which you created in step 1 (beginning of the solution) field, to add it to the Screen element, as shown in the following screenshot:

- On the Screen preview pane, click on the FlowProgressBar field to configure its settings, as shown in the preceding screenshot.

- Now add two text fields to it to store First Name and Last Name onto Screen element.
- In the end, Screen -1 will look like the following screenshot:

- On the Screen element, navigate to the Custom section and double-click on the FlowProgressBar (A component which you created in step 1 (beginning of the solution) field, to add it to the Screen element, as shown in the following screenshot:
- The next step is to update the current stage from Enter Your Name to Enter Email Address. For this, we will use an Assignment element. Drag and drop an Assignment Element (Give the name Move to Step 2) onto the canvas and map the fields according to the following screenshot:

- Add one more screen element to your flow so that people can enter their email address. Drag and drop a Screen element onto the canvas, then follow the steps below:
- On the Screen element, navigate to the Custom section and double-click on the FlowProgressBar field, to add it on to the Screen element.
- On the Screen preview pane, click on the FlowProgressBar field to configure its settings, as shown in the following screenshot.

- Now add one more field Email to it to store Email Address onto Screen element, as shown in the following screenshot:

- Use connectors to connect the elements used in the Flow. Finally, your Flow will look like the following screenshot:

- Once done, Save the flow and name it Registration Form, with Type: Screen Flow. Do not forget to activate the Flow by clicking on the Activate button.


Check out this video for step-by-step instructions:

It’s time to test this feature
Now you are certified in using flow with stages! Click on the Run button and see how it looks at the runtime

Wasn’t that a great journey? Now you know how to configure flow screens using stages!
Yes, go ahead! Show off your newly acquired skills to your friends, colleagues, and families!
Please feel free to add constructive comments, insights – and yes, challenges too! – to the blog. Good Luck in your Journey towards becoming a Salesforce Ninja!


Hello Rakesh,
Thanks for these insights. However, there is a problem around navigating backwards using the “Previous” button. I get an error like ” The delimiter of “Initial Information” stage is missing. “.
Have you come across that error and did you find a solution?
Cheers,
Cyrus
I just tested it in my dev org, and it’s still working for me, even the previous button without any errors.
Hi what is the appexchange product we have used to get the progress indicator
Try Dynamic Flow Progress
Can you make this useable for non salesforce users? Or even pass a link to a contact to update missing field information to write back?
Yes, you can for sure. You URL to pass the parameter (as Contact Id) and the rest is your logic.
This implementation has a limitation though. When you click on progress tab instead of the next/previous button, it does not jump to the correct screen. Have you found a solution for it? If yes, please share!
Nice catch. Sorry, I didn’t get a chance to try it.
I cannot see the FlowProgressBar lightening component in the flow of the Field Settings tab. Could anyone help me on this.
I see what you mean. Go ahead and create one FlowProgressBar lightening component using this code.
Awesome. Thanks for sharing this tutorial!
🙂